Deny Application Access in Keycloak
Keycloak makes Single Sign-On authentication easy thanks to OpenID Connect (OIDC). Authorization though is a mixed bag.
Authorization for Keycloak clients is usually deferred to the client application. Keycloak says “Hey - this user is authenticated, they’re good to go!” and passes your information back to the client.
This is not ideal in some situations. For example, OpenShift will create an account for any Keycloak user that successfully authenticates. You can set new users to have 0 permission in OpenShift but a user will still be created in OpenShift if that user authenticates through Keycloak.
To explicitly deny users from accessing an application, I use a custom authentication flow in Keycloak. The flow denies users on the Keycloak login screen, before they are even redirected to the application. If the user isn’t allowed to access the application, Keycloak stops the process and doesn’t redirect back to the client. Instead it shows an error indicating that the user is not authorized to access the application.
Below are step-by-step instructions to configure a custom autheitcation flow to deny users that aren’t in a particular group in Keycloak. Since Keycloak is configured through the web UI, these are manual instructions (but I included a bunch of screenshots).
These instructions use OpenShift as the application. It’s assumed that an OpenShift client has been configured in Keycloak and that OpenShift has been configured to use that client for authentication.
Create the Role, Group, and Role Mapping
The first step is to create a realm role, create a group, and map those together. It’s a good idea to keep these the same name.
I used ocp-user for my realm role and group name.
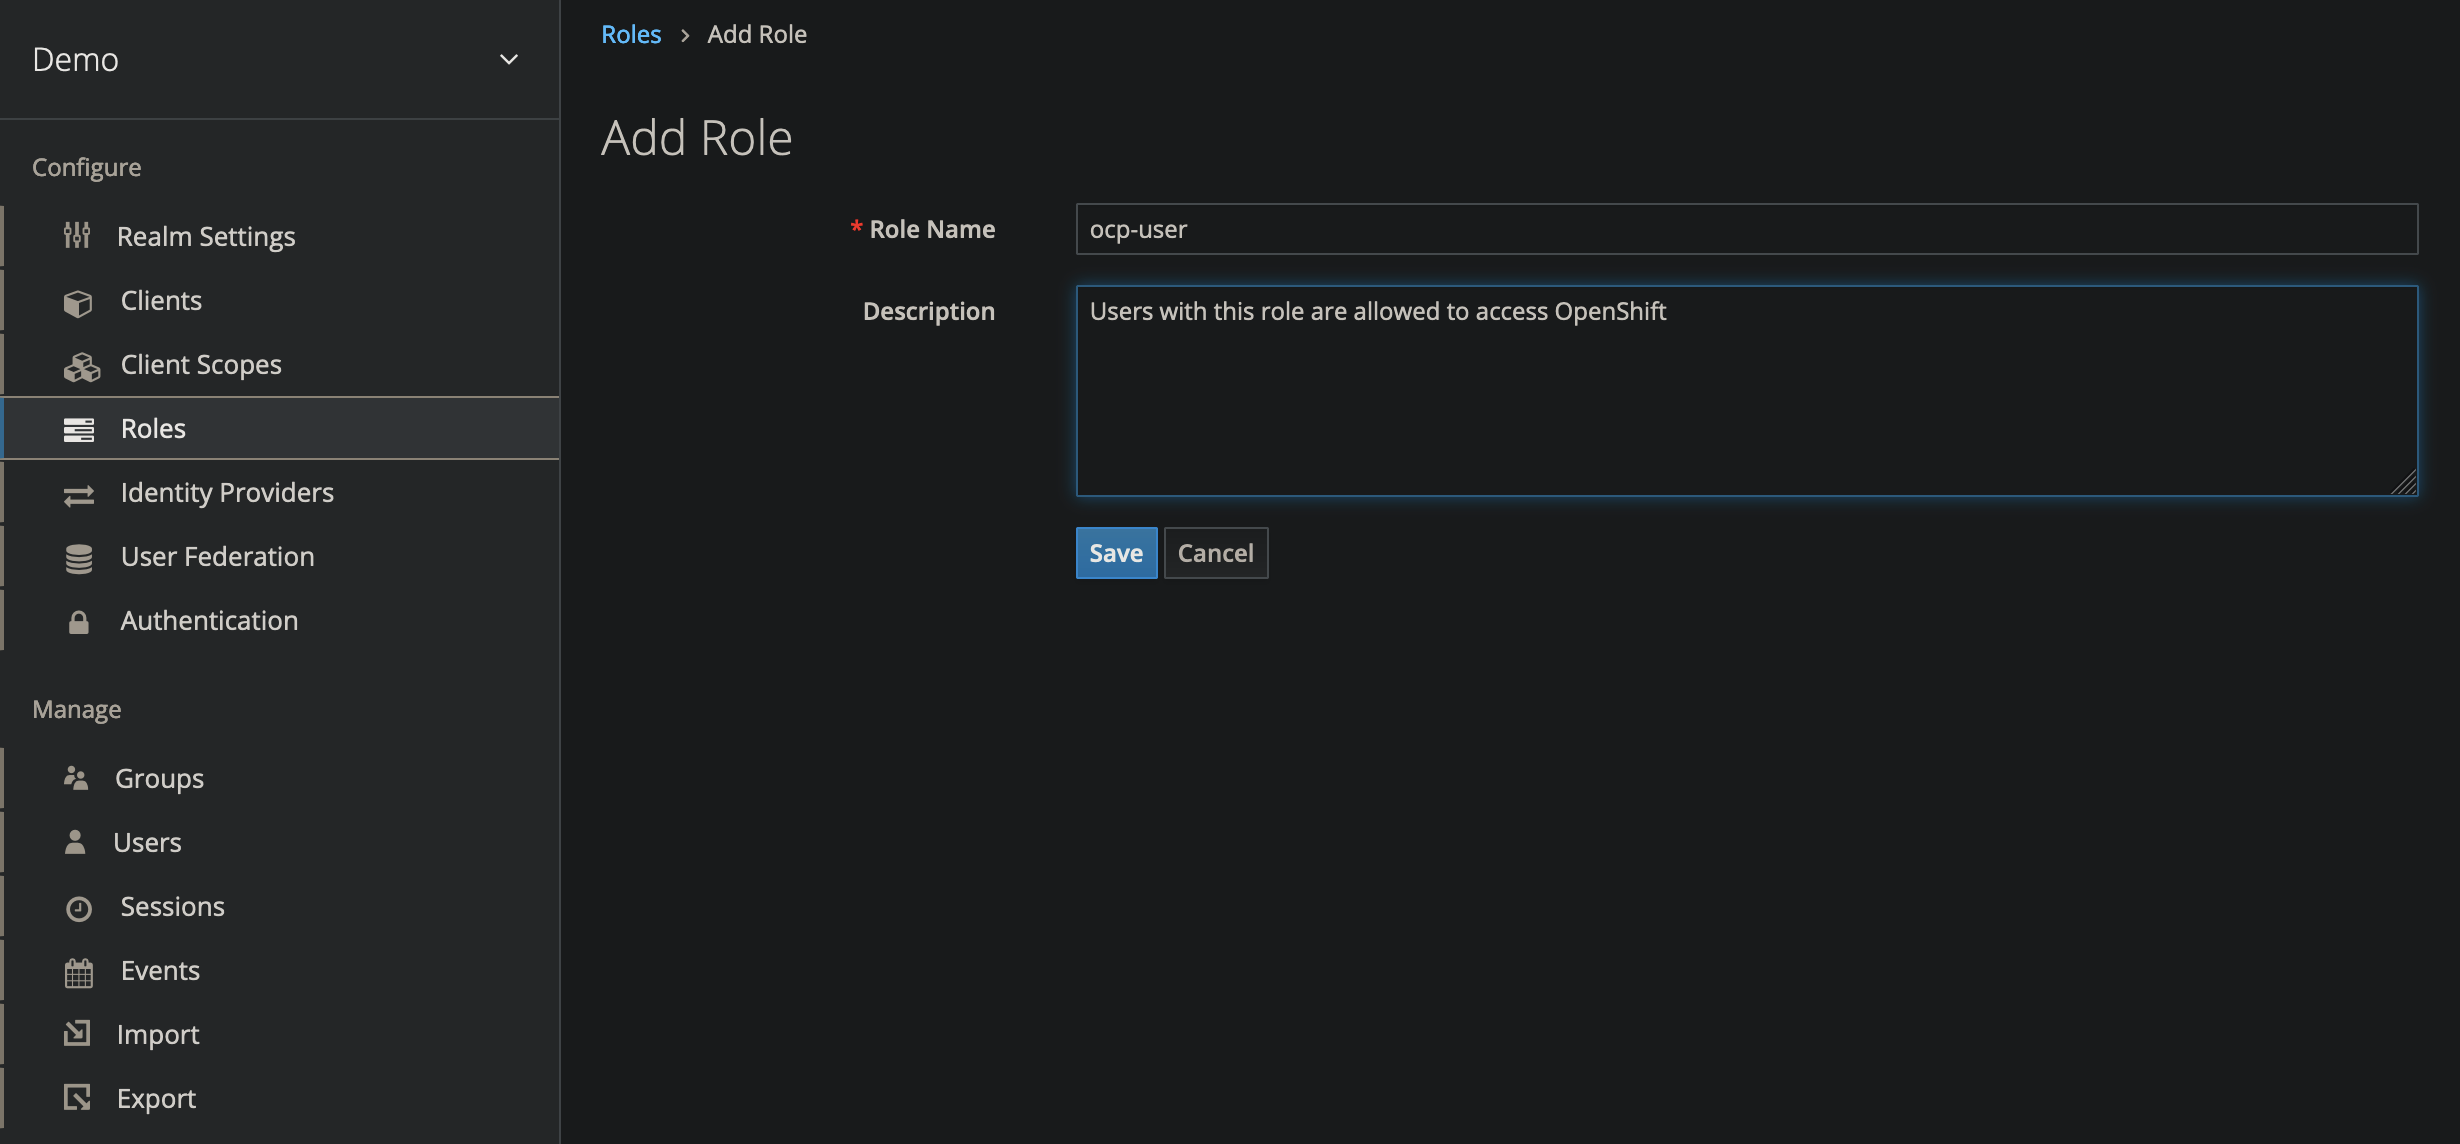
Add a New Realm Role
- On the left side navigation bar, select Roles
- Add a new realm role named
ocp-user
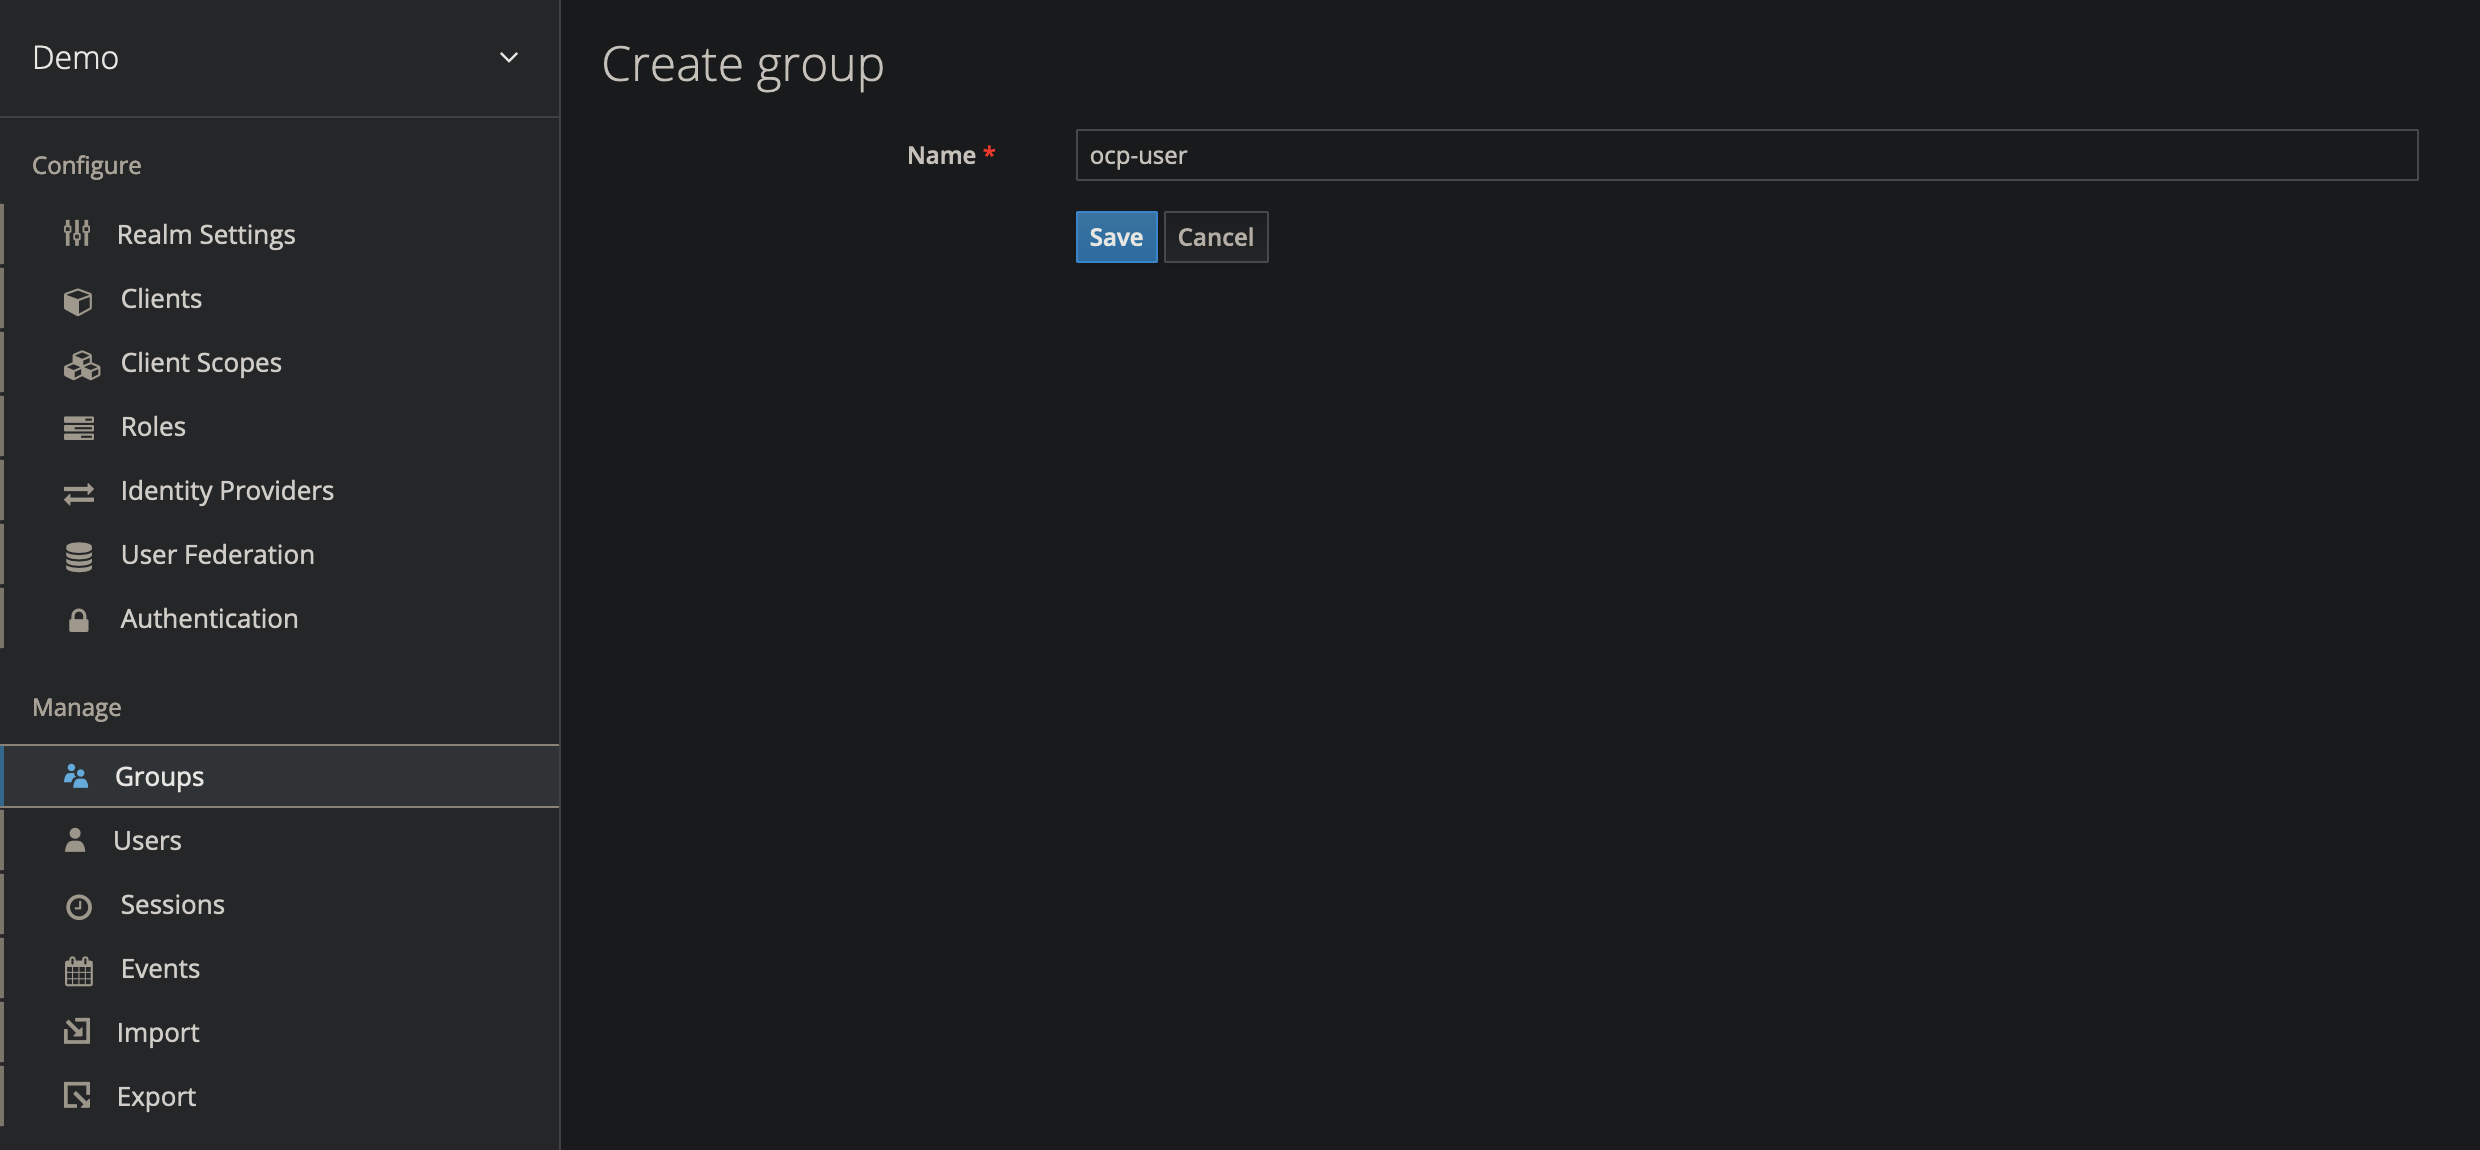
Create a New Group
- On the left side navigation bar, select Groups.
- Create a new group
ocp-user
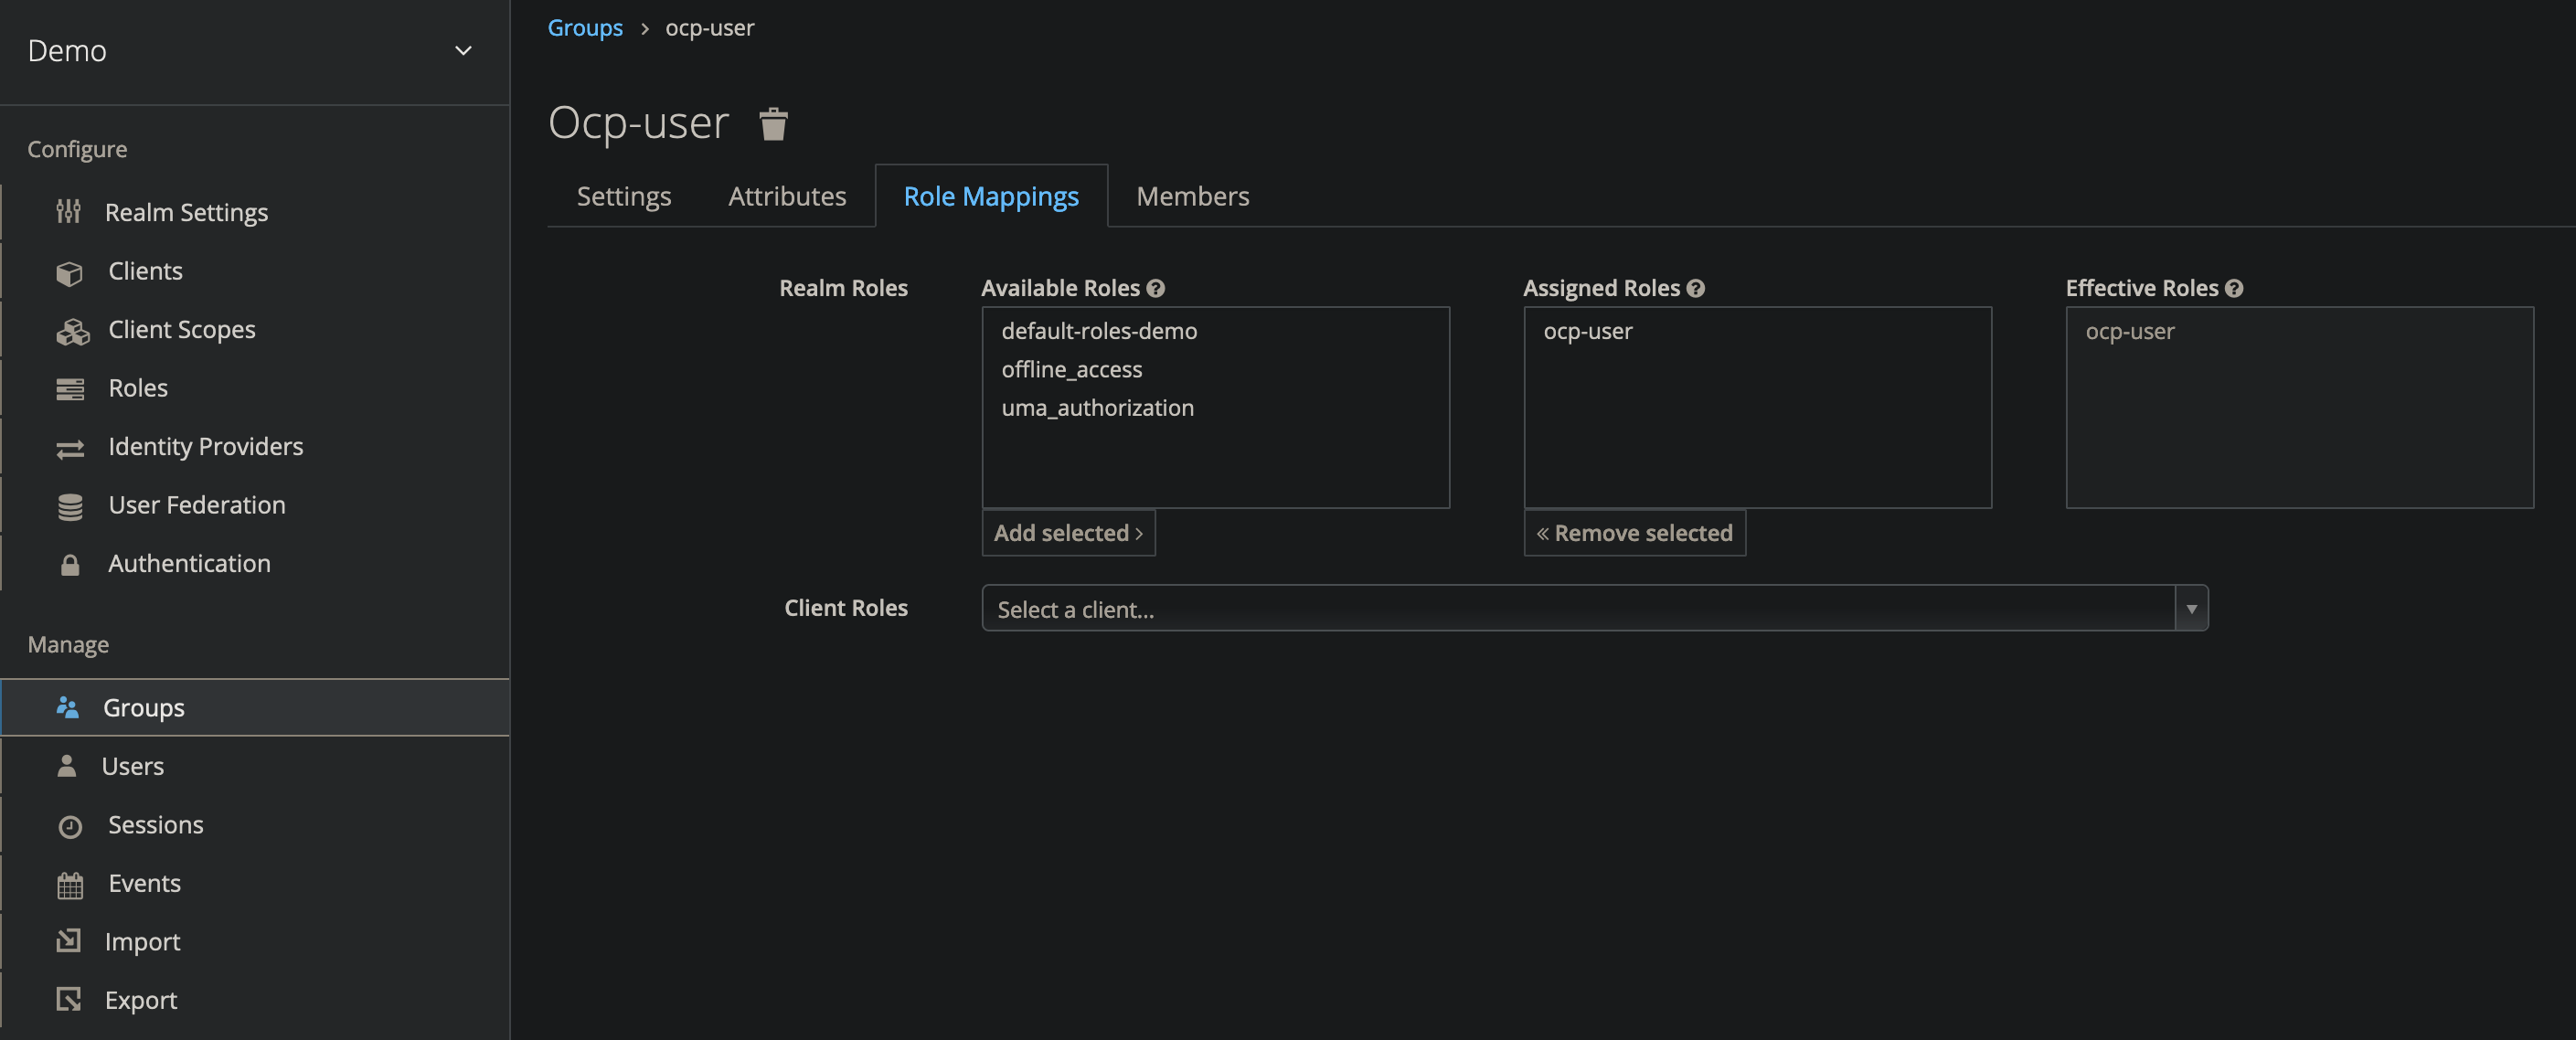
Map the Group to the Realm Role
- On the group page, select the Role Mappings tab
- Under Realm Roles, select
ocp-userto map the role to the group
Create Users
The next step is to create users that will access OpenShift. For this example, I created two users:
ryan- Is an OpenShift userlogan- Is not an OpenShift user
These two users will be tested to validate that Keycloak is denying users that aren’t in the ocp-users group.
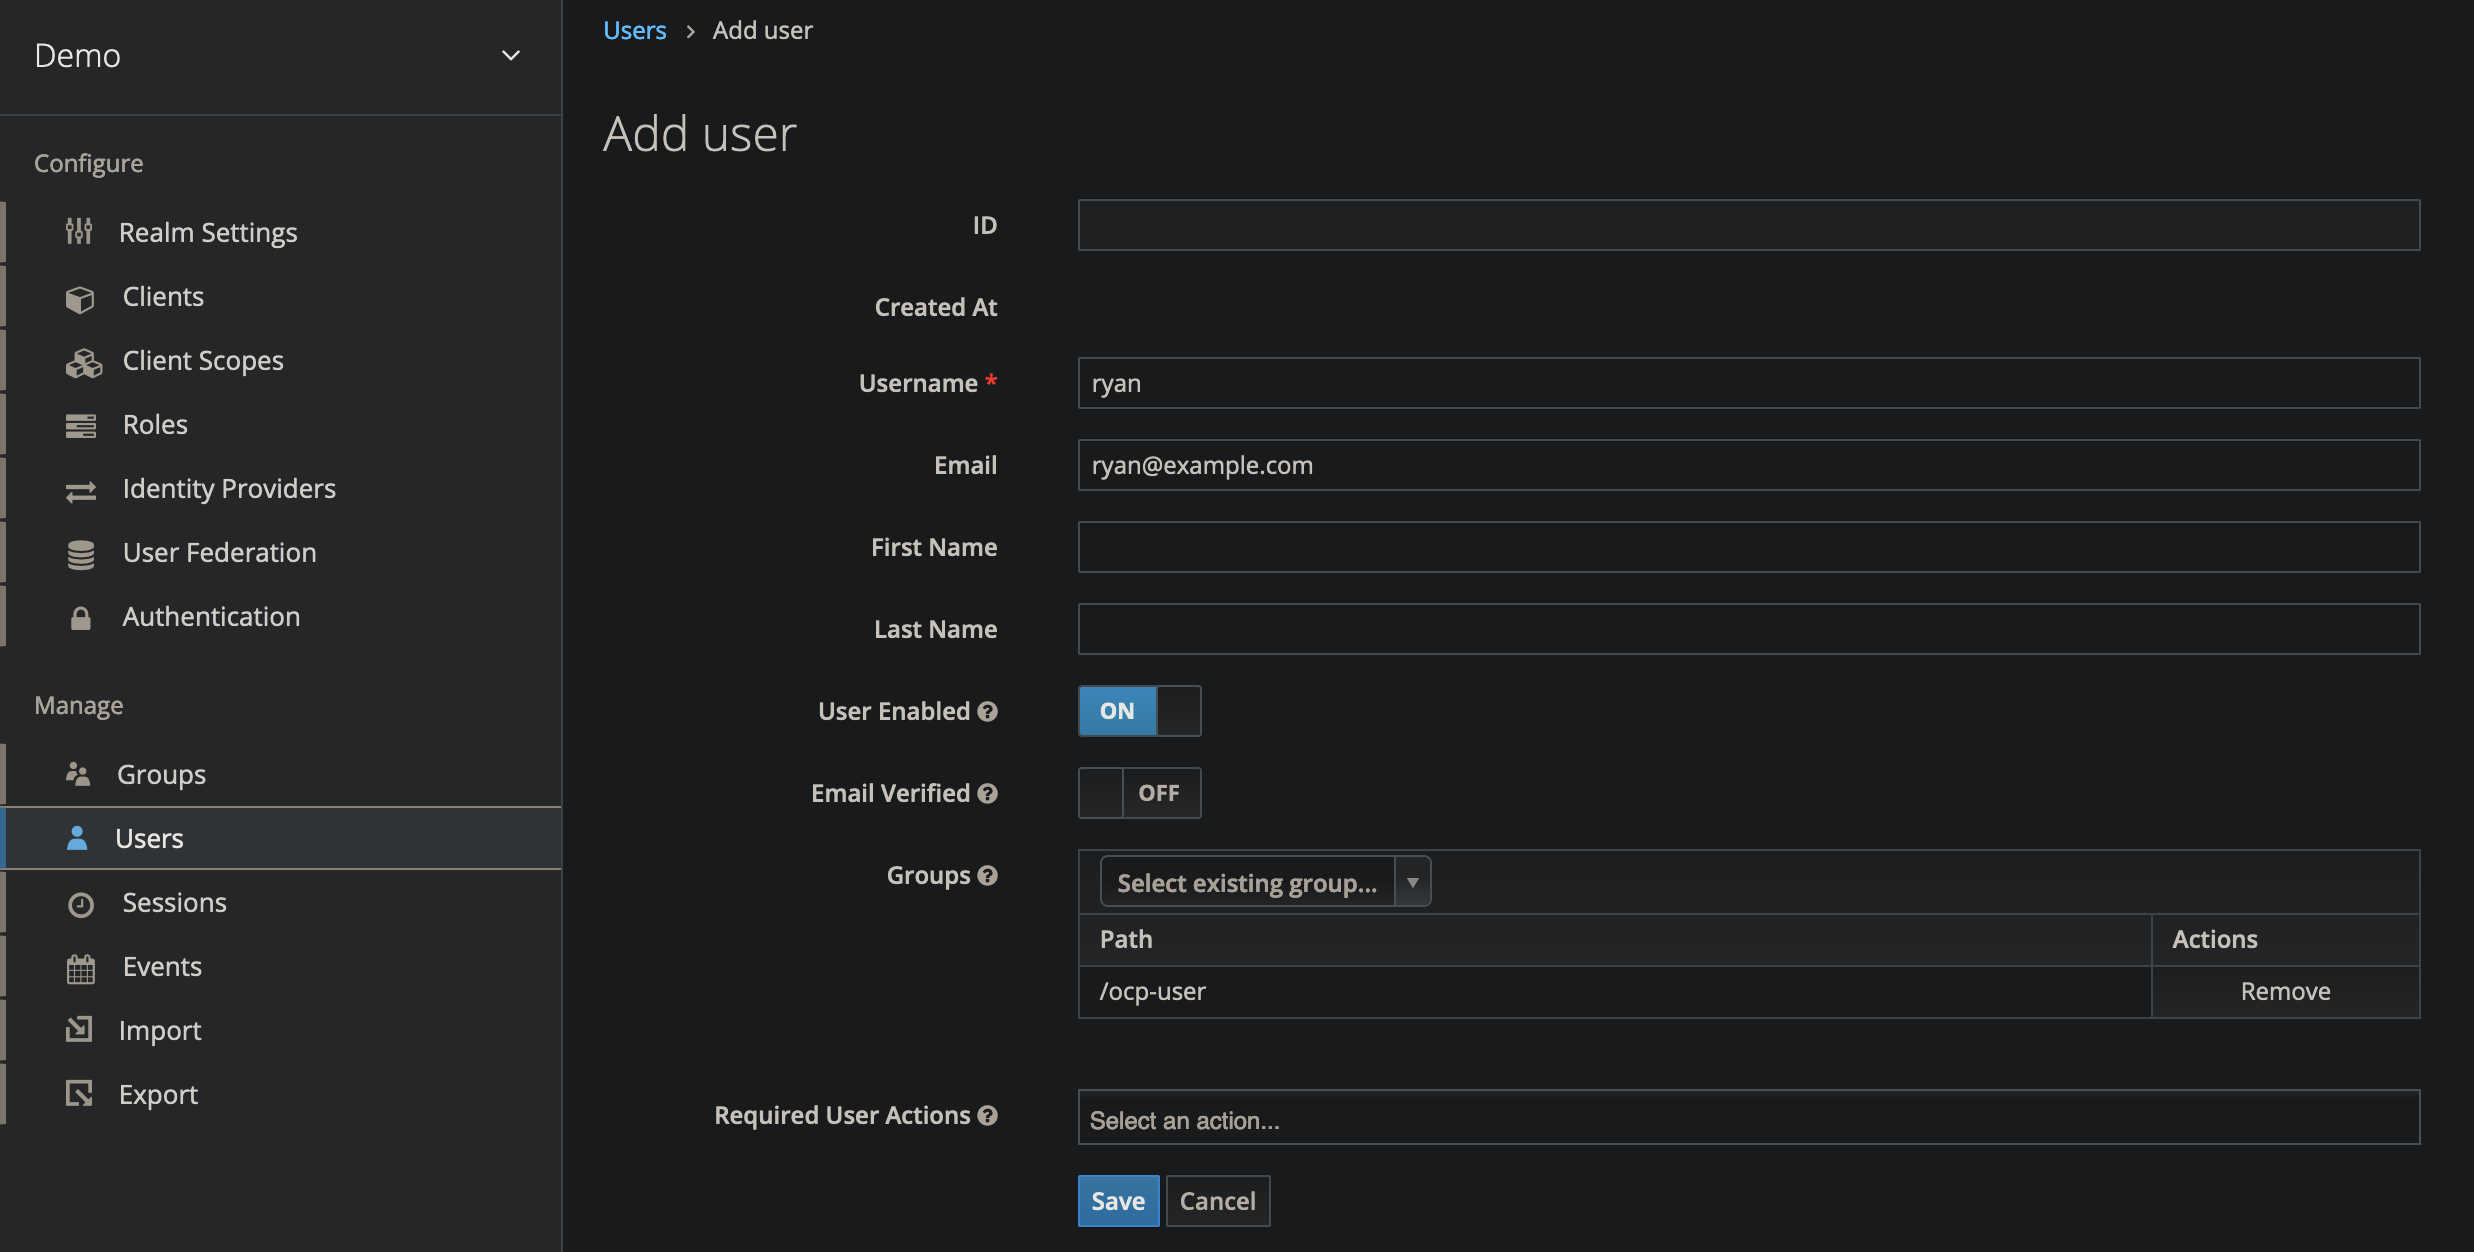
Create an OpenShift User
- On the left side navigation bar, select Users
- Create a new user named
ryan - Add the user to the
ocp-usergroup
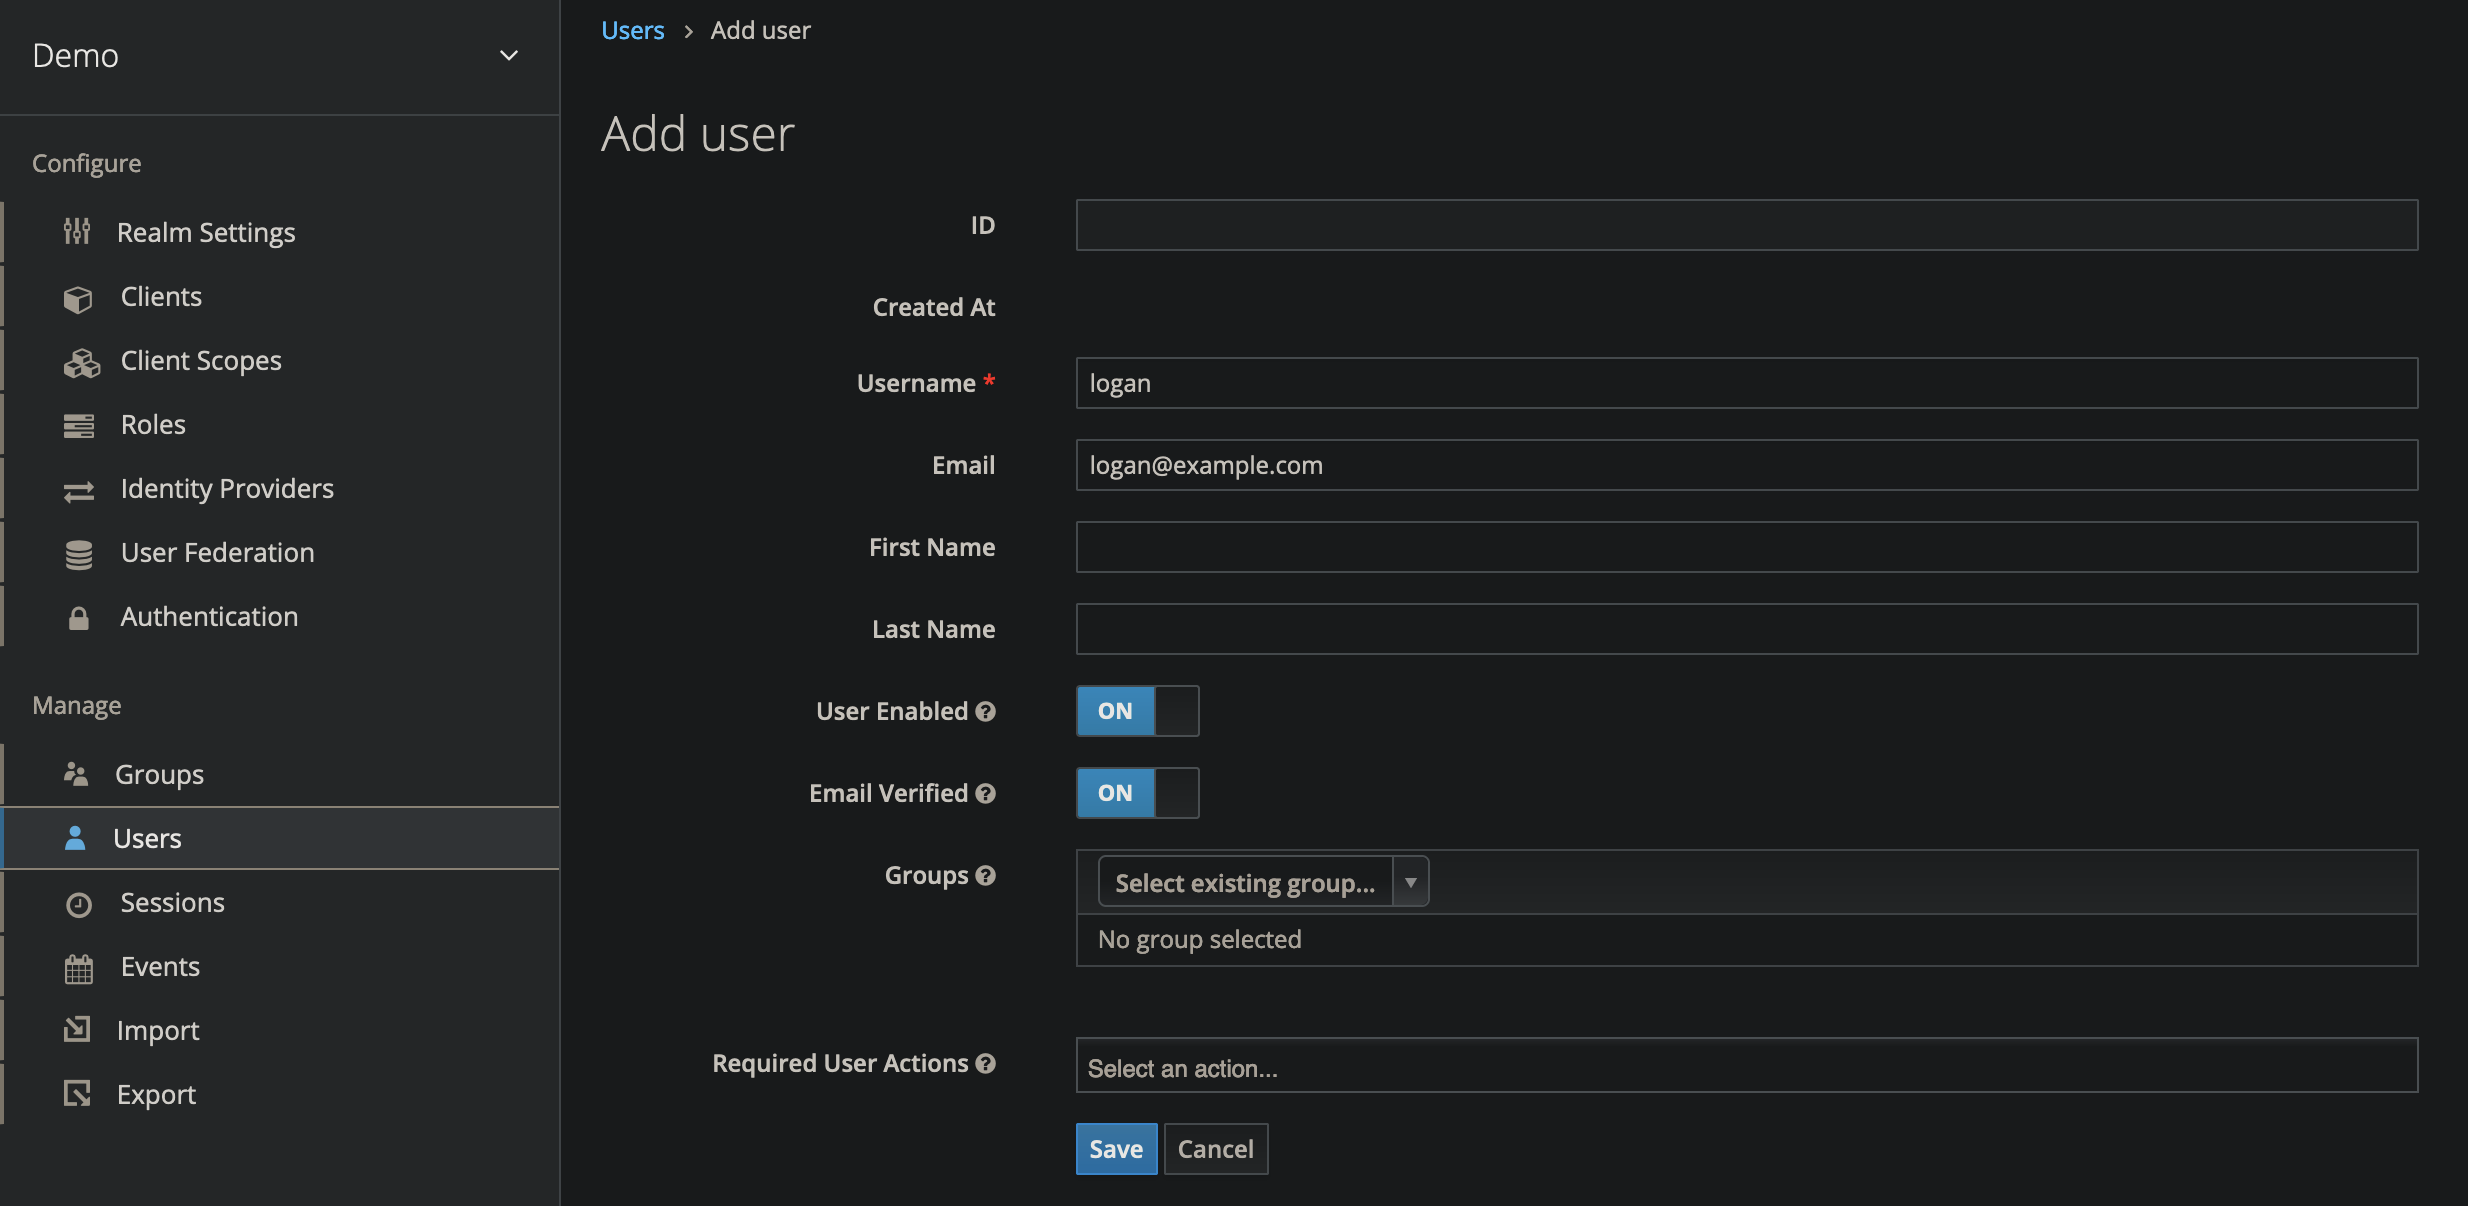
Create a Regular (Non-OpenShift) User
- On the left side navigation bar, select Users
- Create a new user named
logan - Do NOT add the
ocp-usergroup membership on this user
Create an Authentication Flow
The next step is to create an authentication flow that will be executed when a user is redirected to Keycloak for authentication. Keycloak comes with several authentication flows out of the box. I find it easier to start from scratch instead of copying an existing flow. Once you create an initial flow, it’s ok to copy that flow for other applications. (For example if you need to deny access to OpenShift and Vault based on two separate groups.)
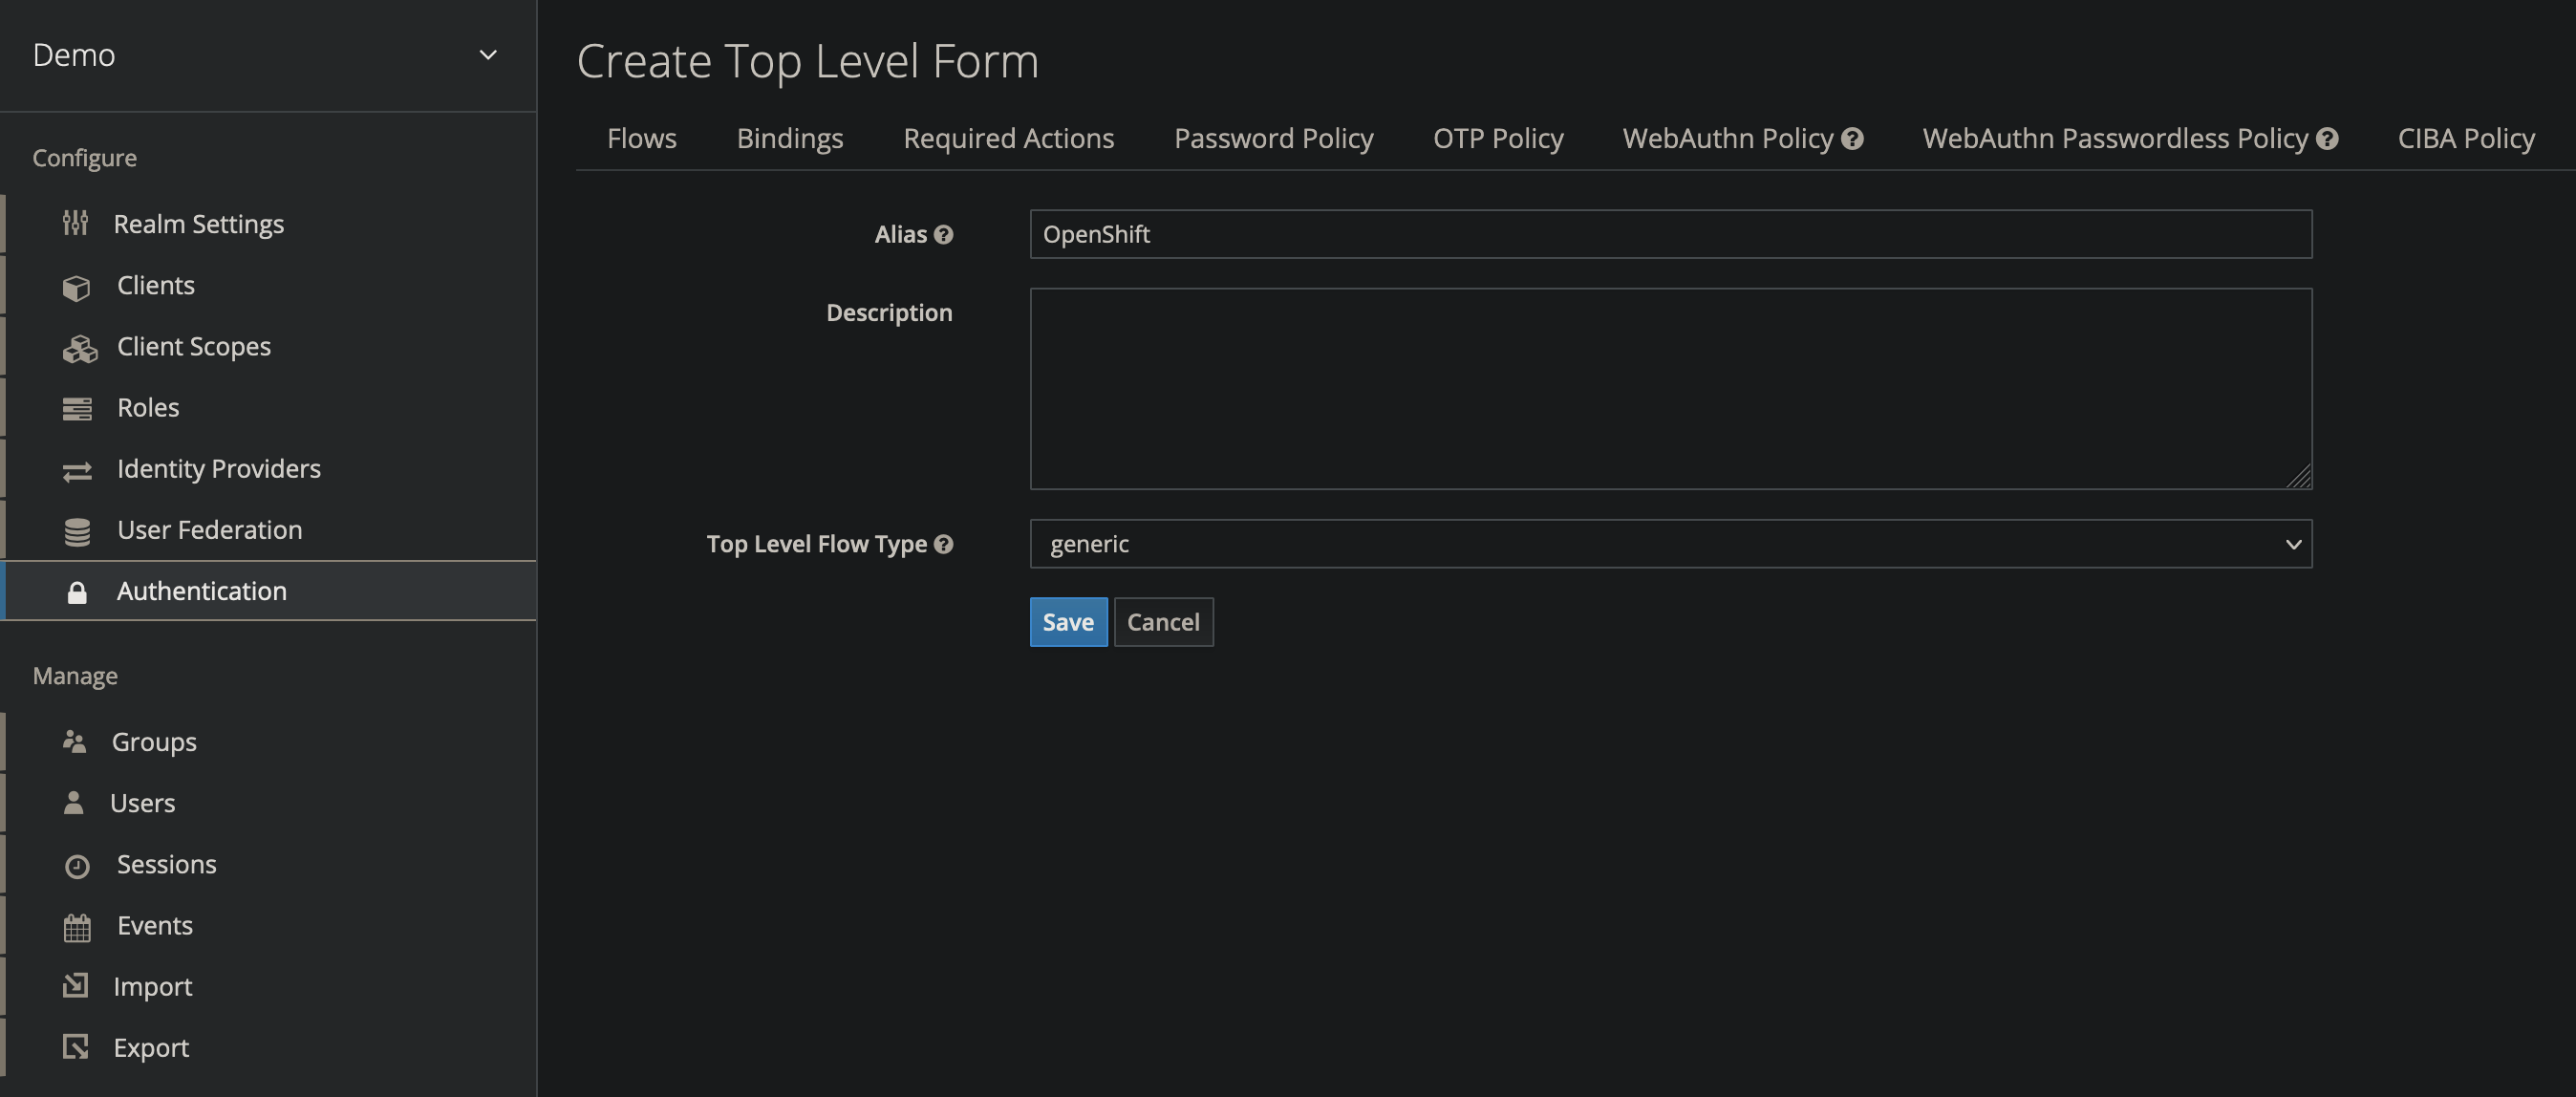
Create the OpenShift Authentication Flow
- On the left side navigation bar, select Authentication
- On the right, select New
- Name the authentication OpenShift
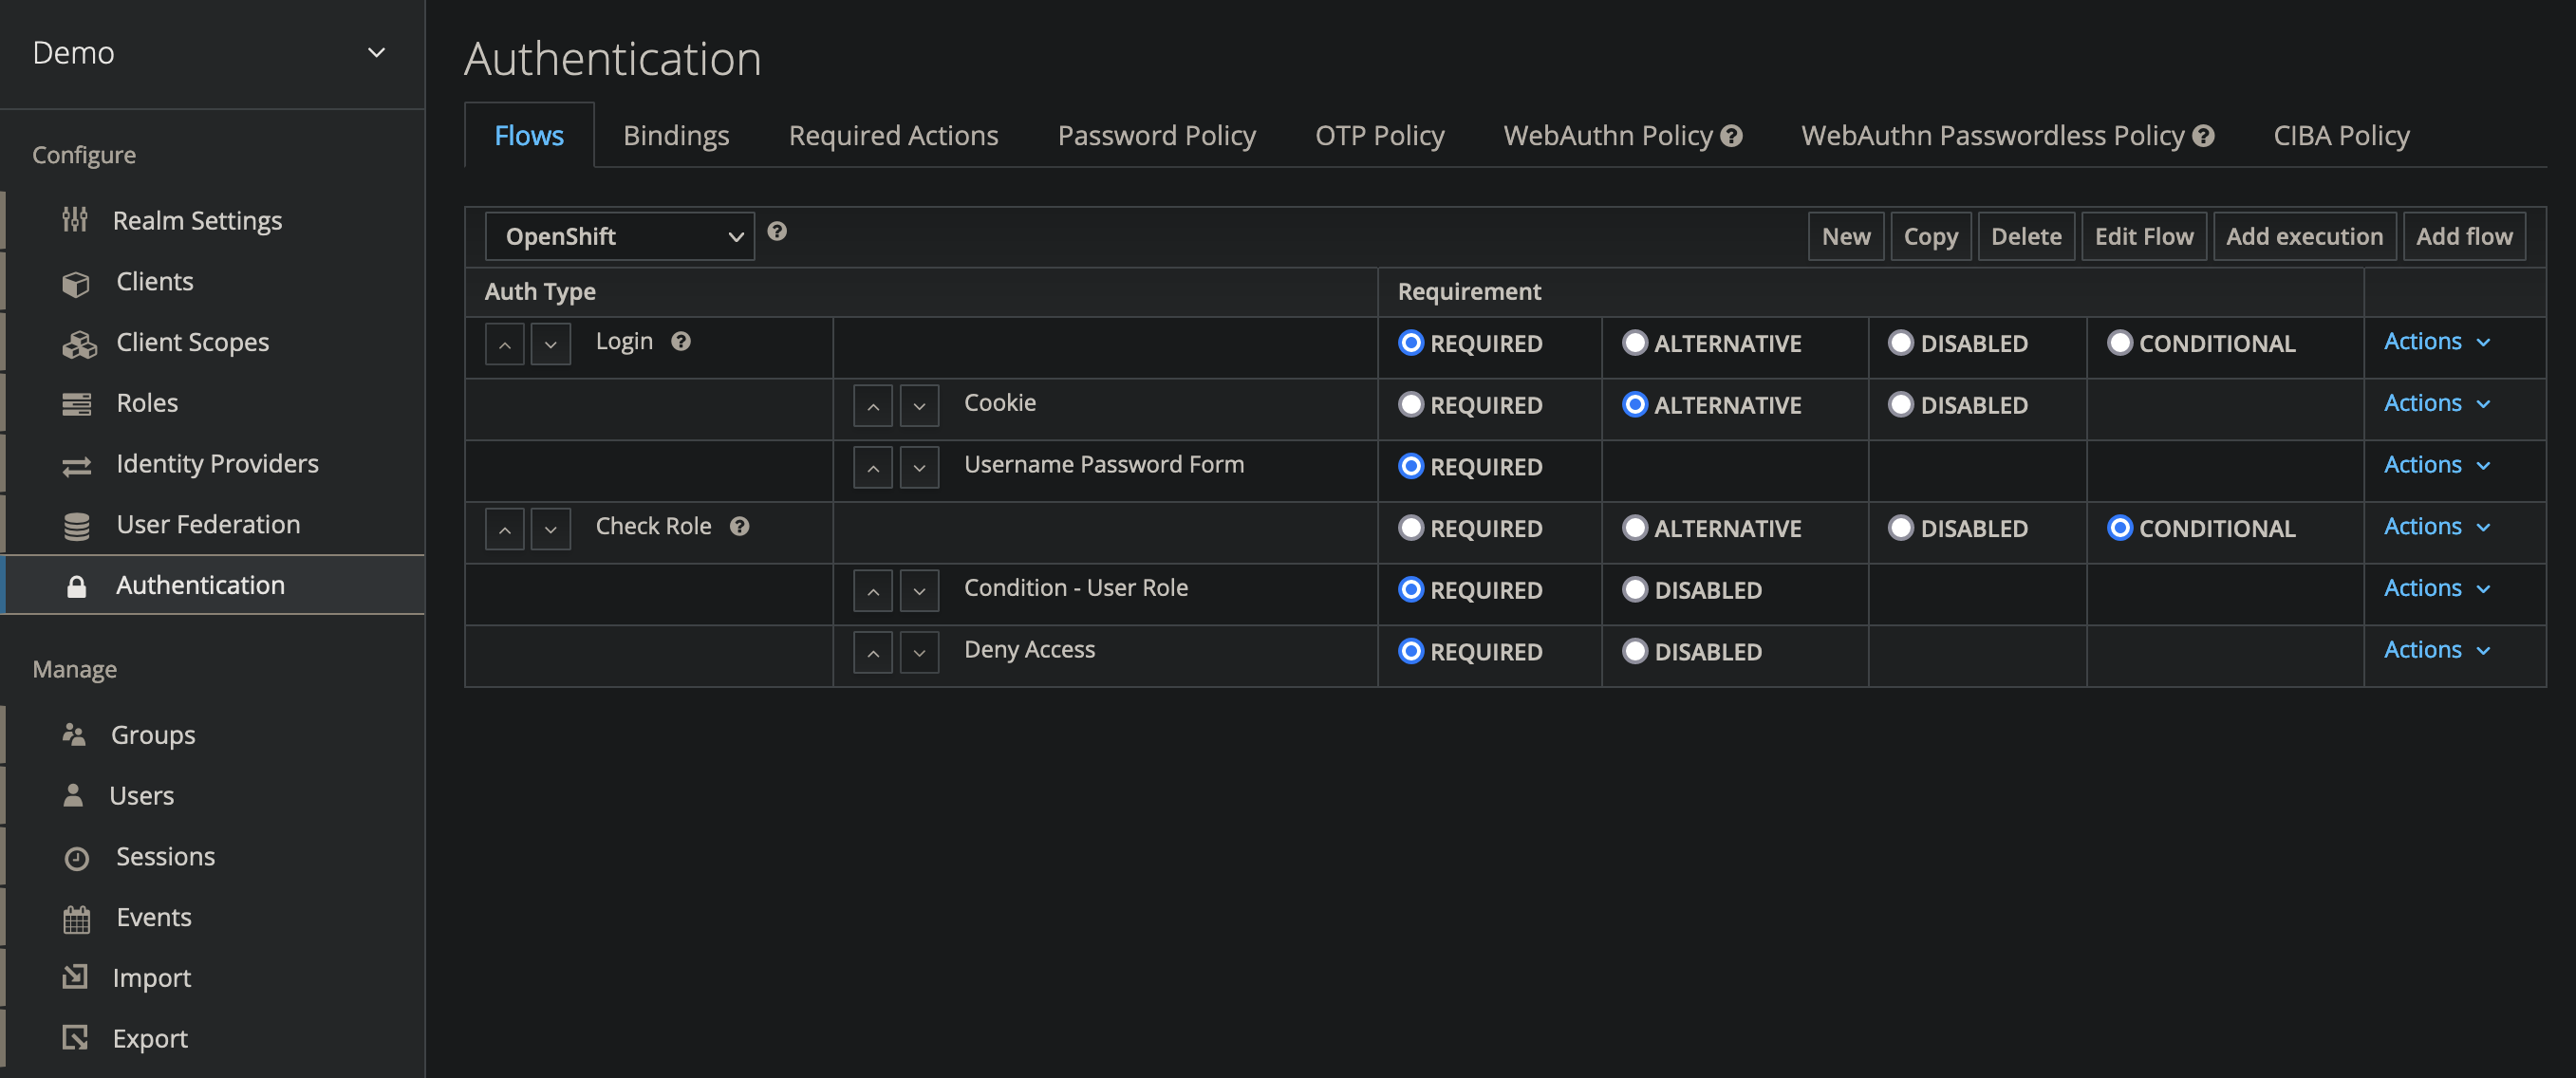
Add Execution Steps into the OpenShift Authentication Flow
- On the right, select Add Flow
- Create a flow named Login
- On the right, select Add Flow again
- Create a flow named RBAC
-
Make sure the flows are not nested. They should both be at the root level.
- On the Login flow, select Actions, then Add Execution Step
- Select
Cookie(as Alternative) - Under the Login flow, select Actions, then Add Execution Step again
-
Select
Username Password Form(as Alternative) - On the Check Role flow, select Actions, then Add Execution Step
- Select
Condition - User Role - On the Check Role flow, select Actions, then Add Execution Step again
-
Select
Deny Access - Set the Requirement on each of the flows/execution items
- Login - Required
- Cookie - Alternative
- Username Password Form - Required
- Check Role Conditional
- Condition - User Role - Required
- Deny Access - Required
- Login - Required
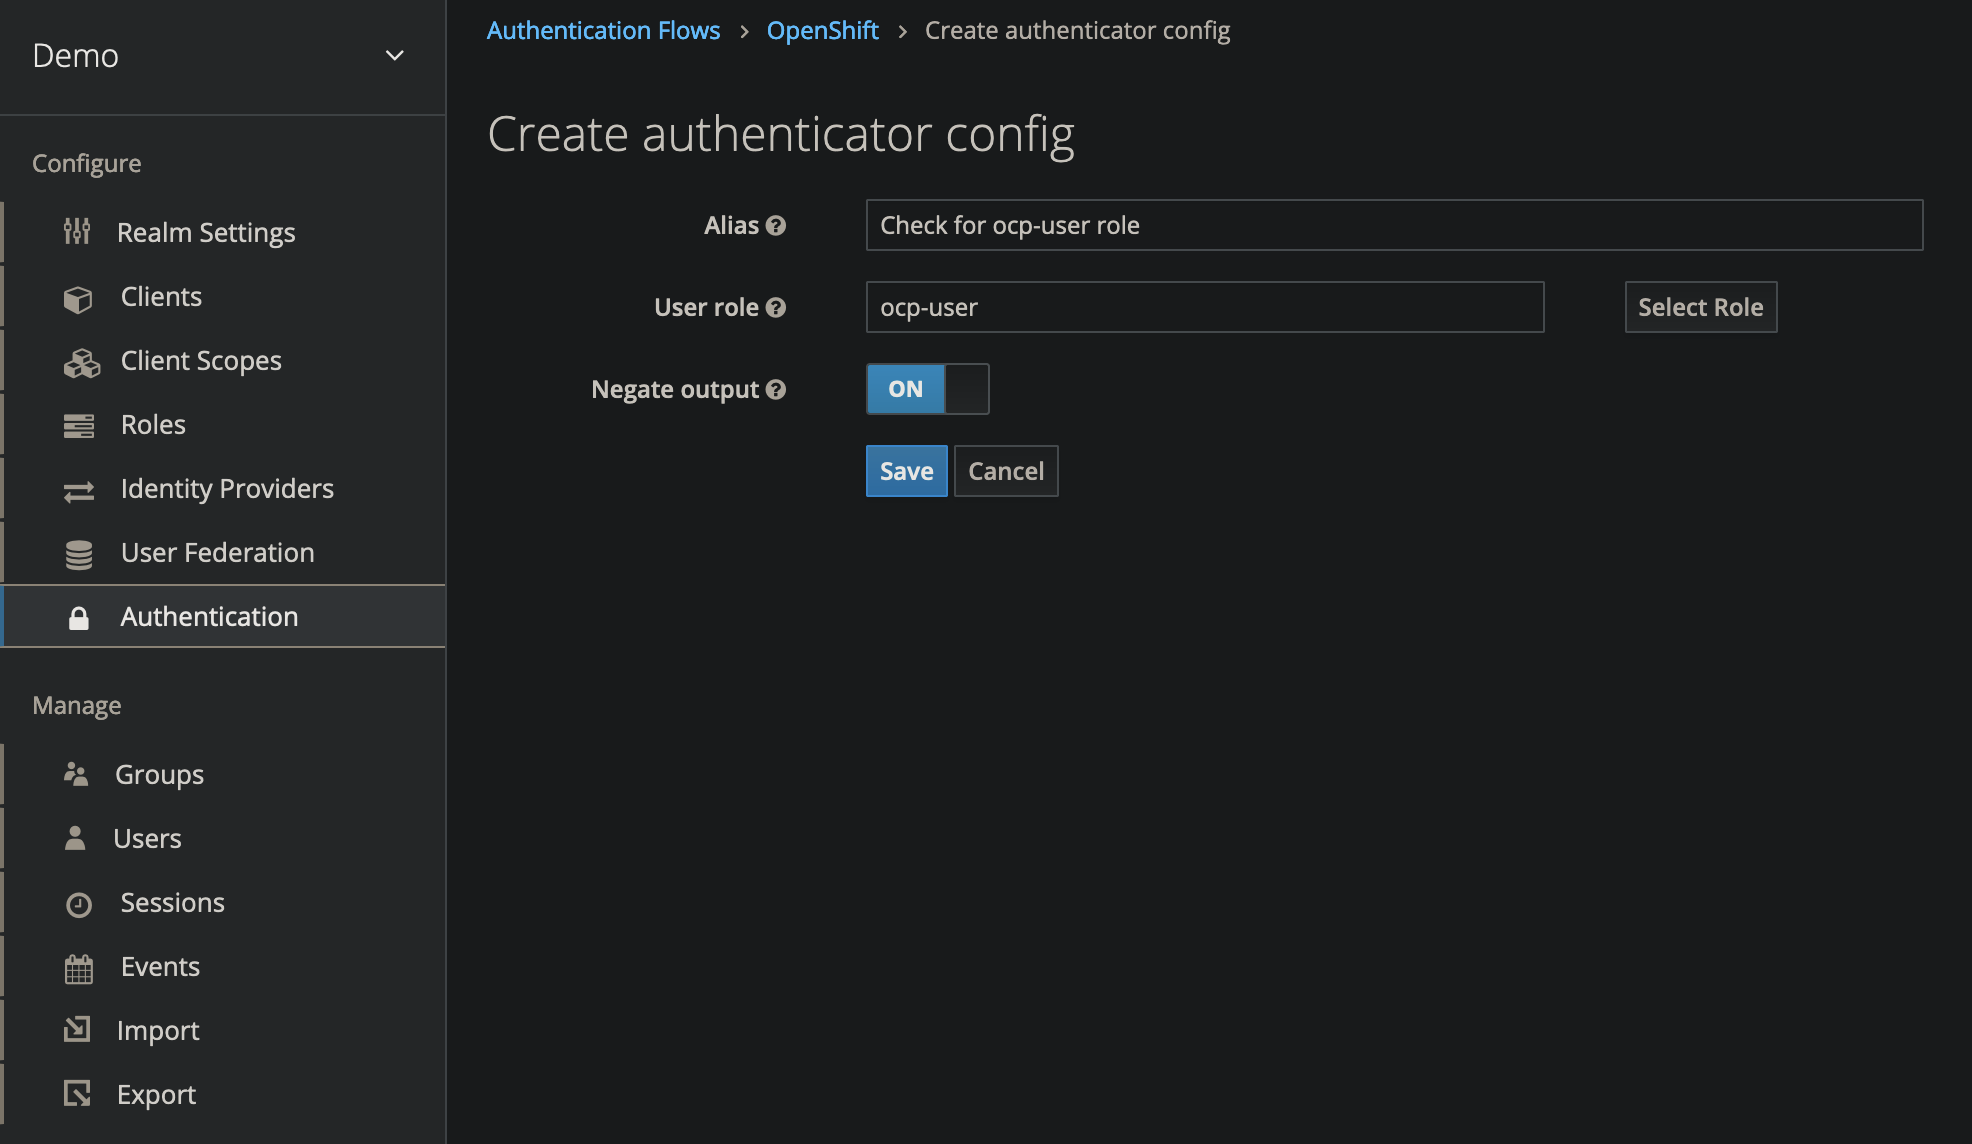
Configure the Execution Steps
- Only two of the configuration steps added in the previous step need to be configured
- On the Condition - User Role execution step, select Actions, then Config
- Set User role to
ocp-user - Set Negate output to ON
- On the Deny Access execution step, select Actions, then Config
- Set Error Message to
Access Denied: User does not have the "ocp-user" role

Configure the Client
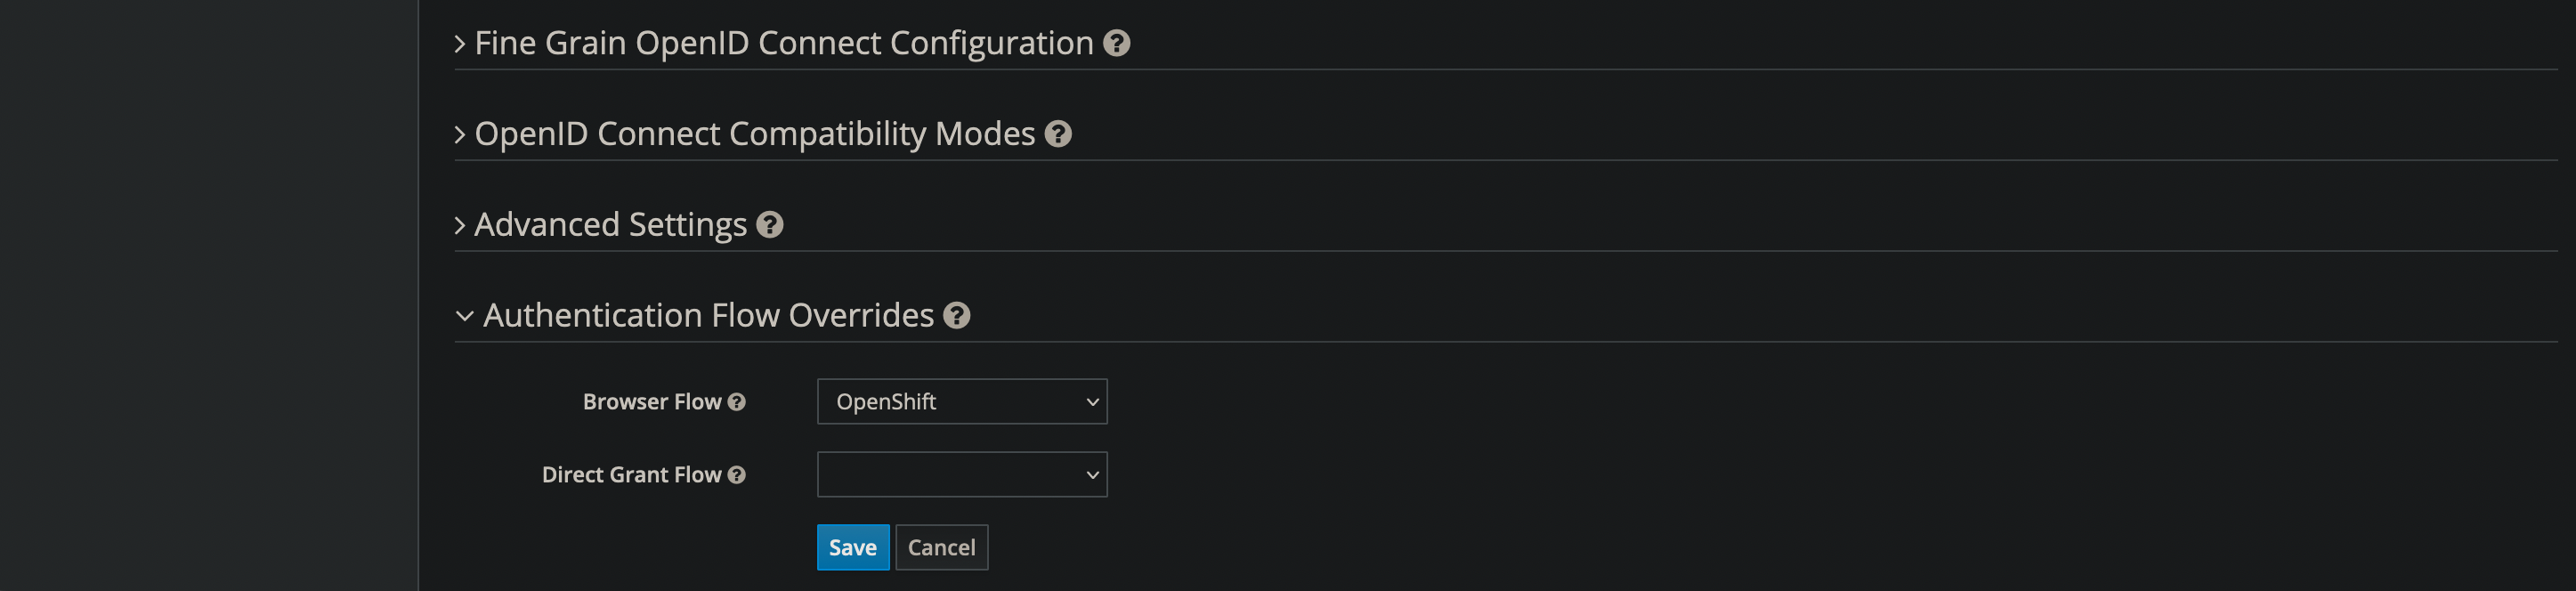
The last step is to configure the OpenShift client in Keycloak to use the OpenShift authentication flow created in the previous step. Each realm in Keycloak has a default authentication flow for browsers that is used unless a client specifies an override. Within each client, an override can be configured to use any other authentication flow.
Set the OpenShift Client to use the OpenShift Authentication Flow
- On the left side navigation bar, select Clients
- Select the client configured for OpenShift
- On the Config tab, under Authentication Flow Overrides, set the Browser Flow to OpenShift.
Testing It
With everything configured, open a private browser window and navigate to the OpenShift console.
Select the Keycloak provider.
Enter the login information for the OCP user, ryan.
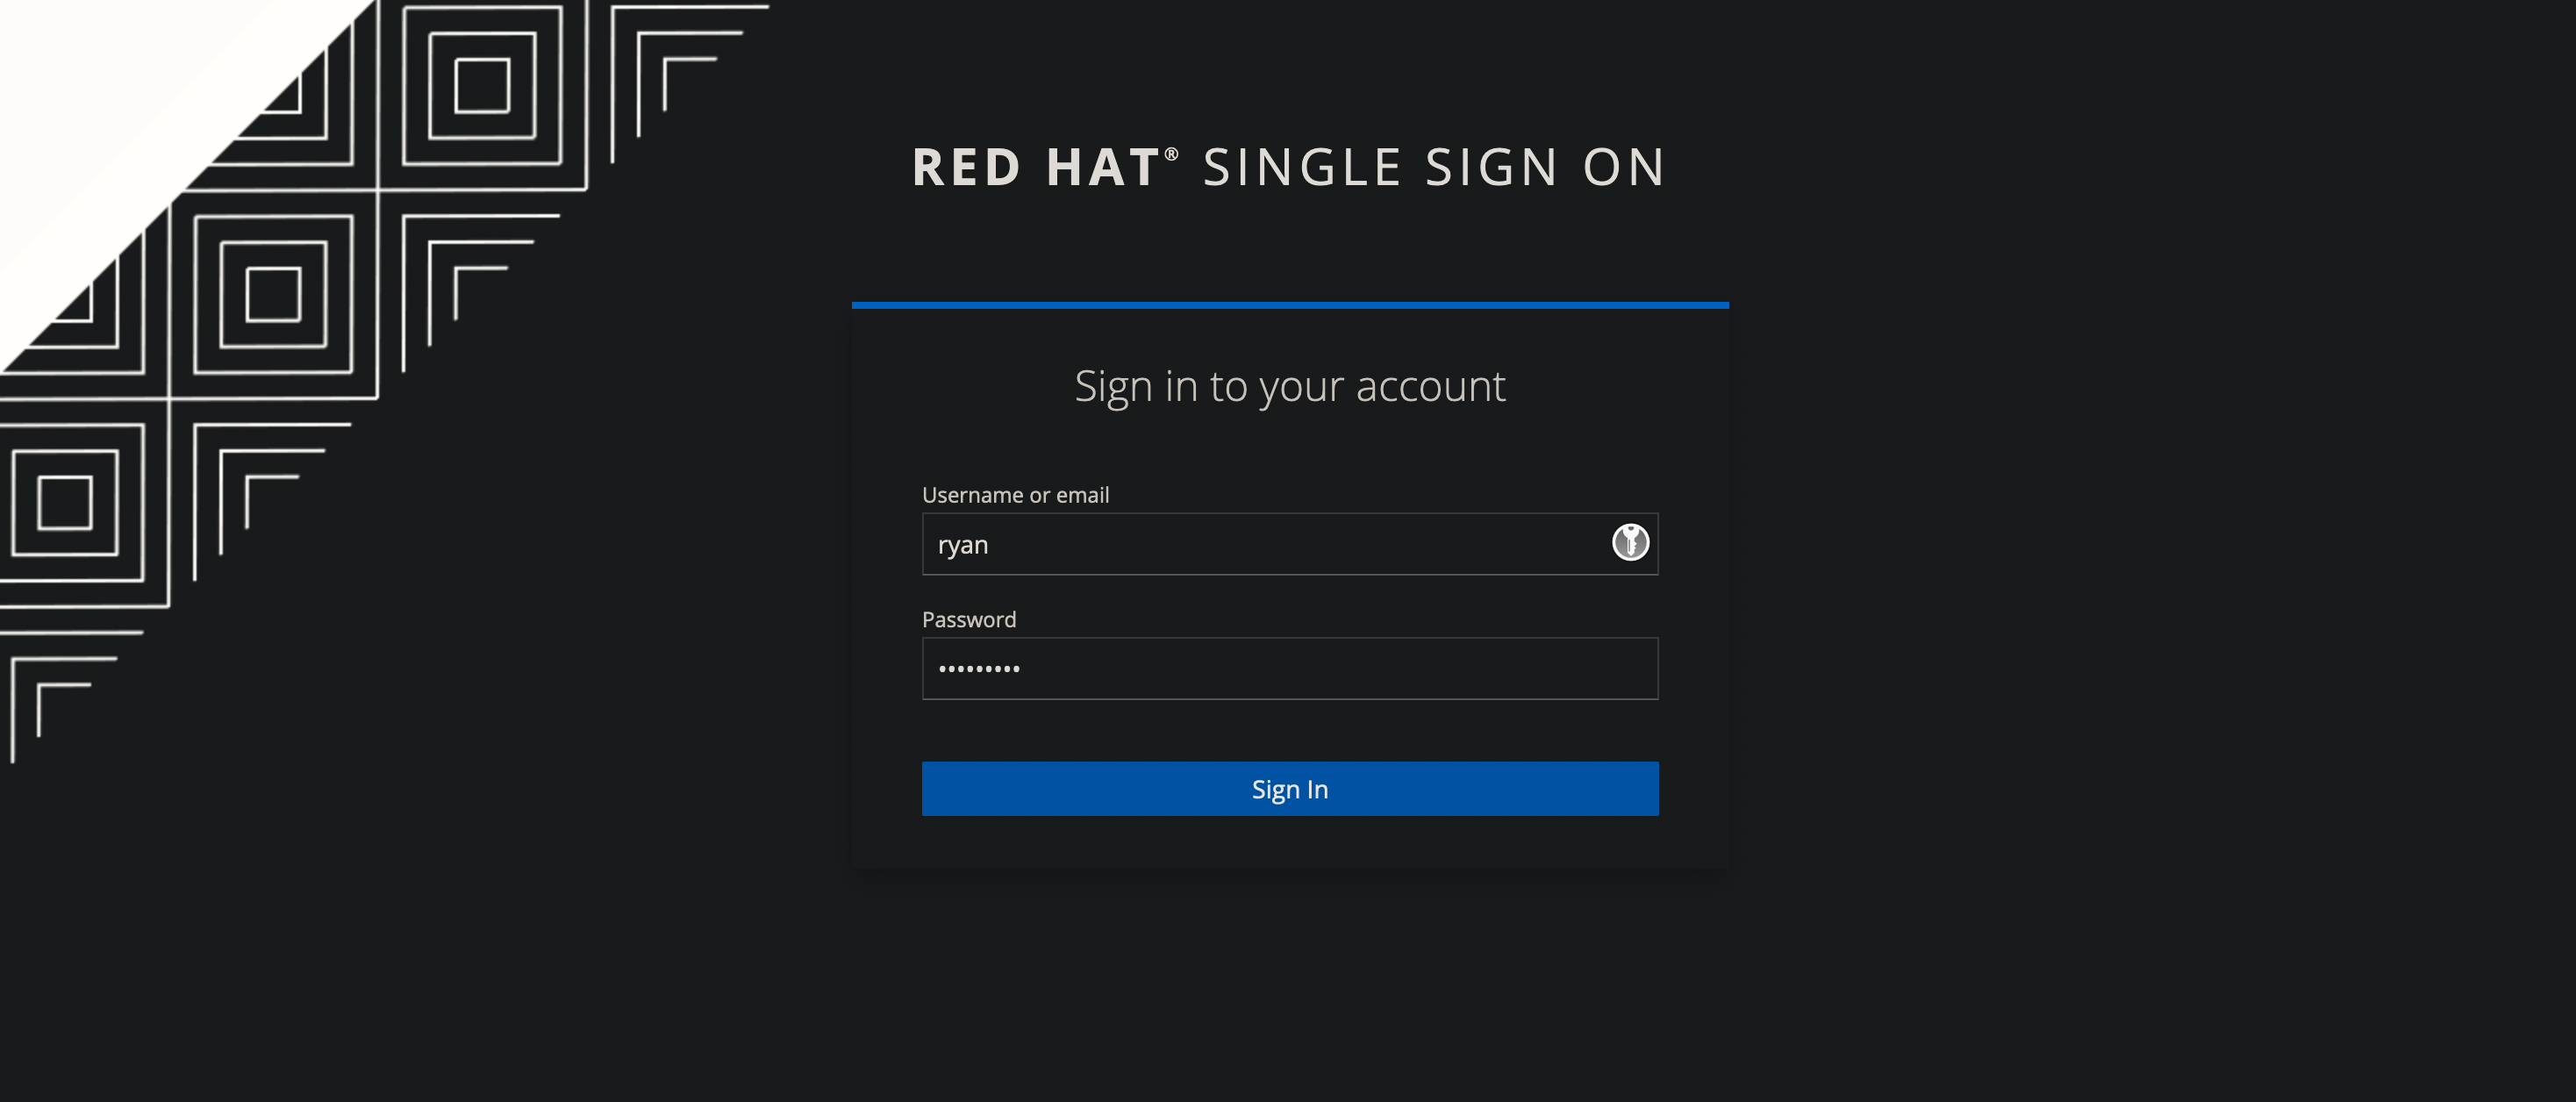
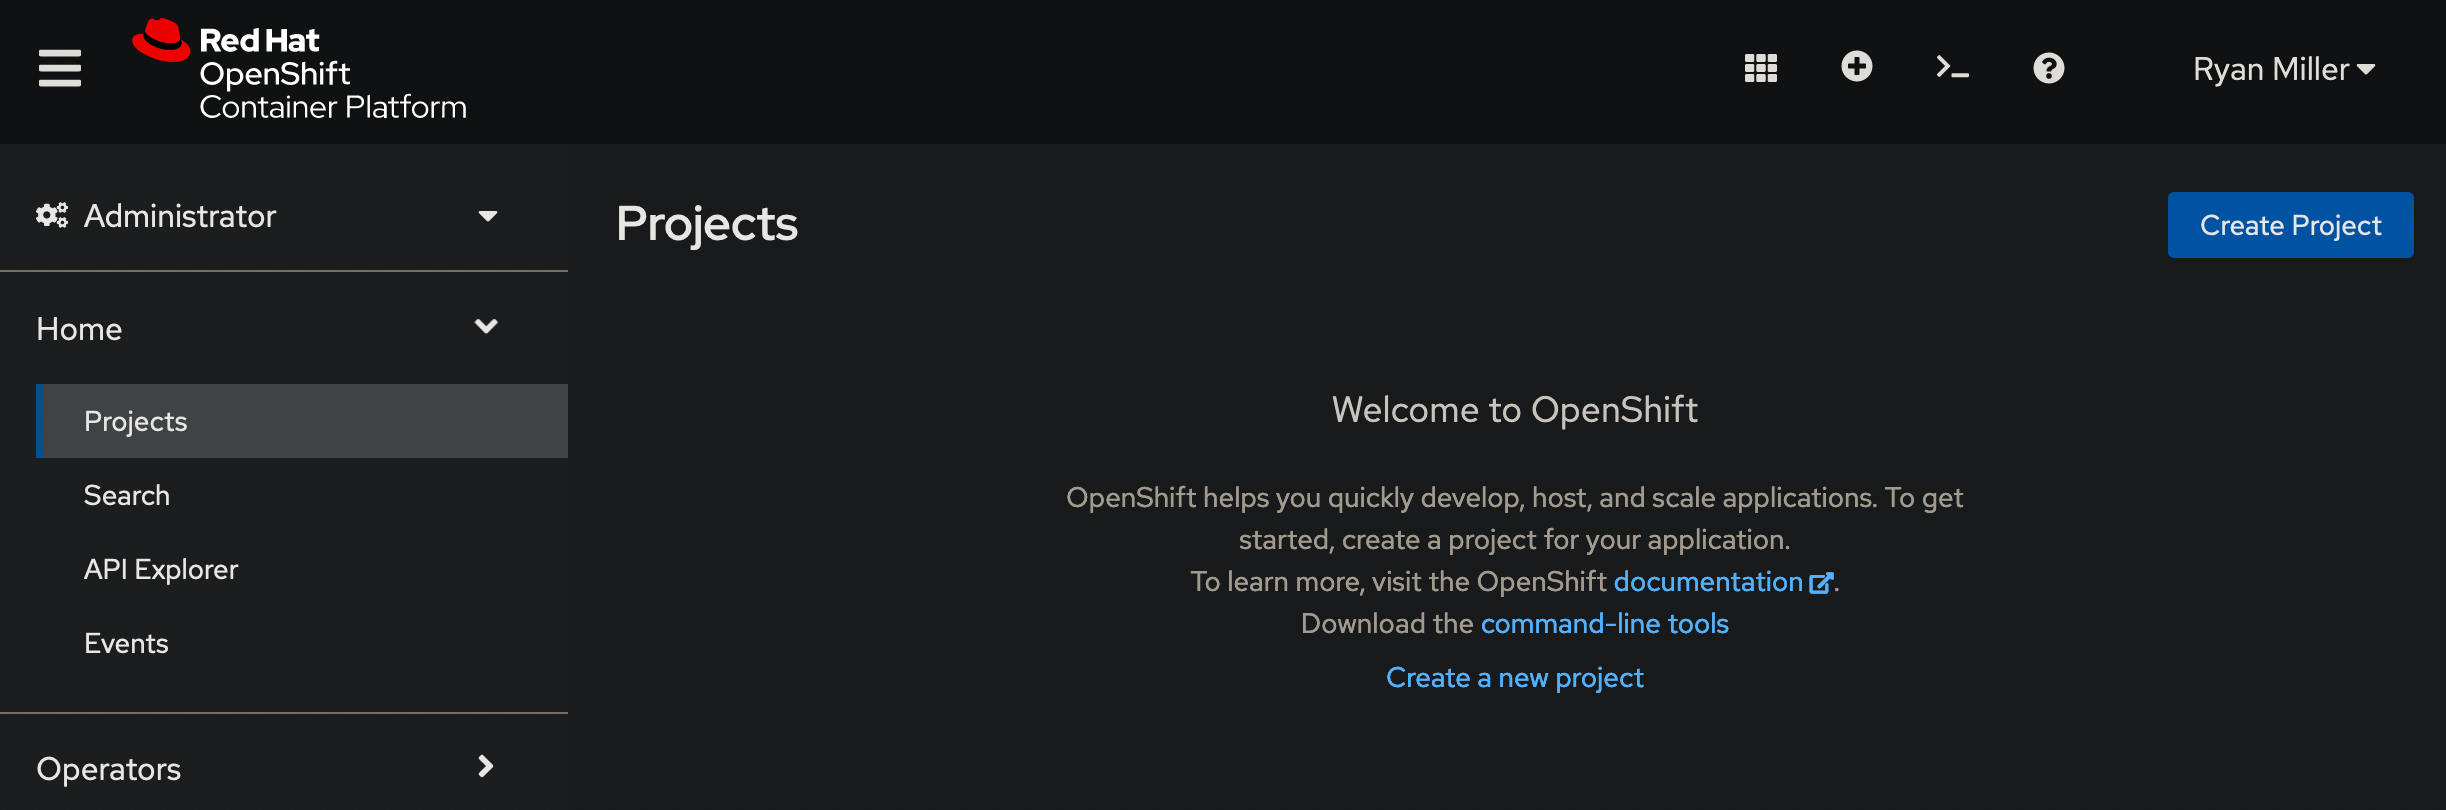
They should be redirected to OpenShift and successfully log in.
Open a second private browser window and navigate to the OpenShift console.
Select the Keycloak provider again.
Enter the login information for the non-OCP user, logan.
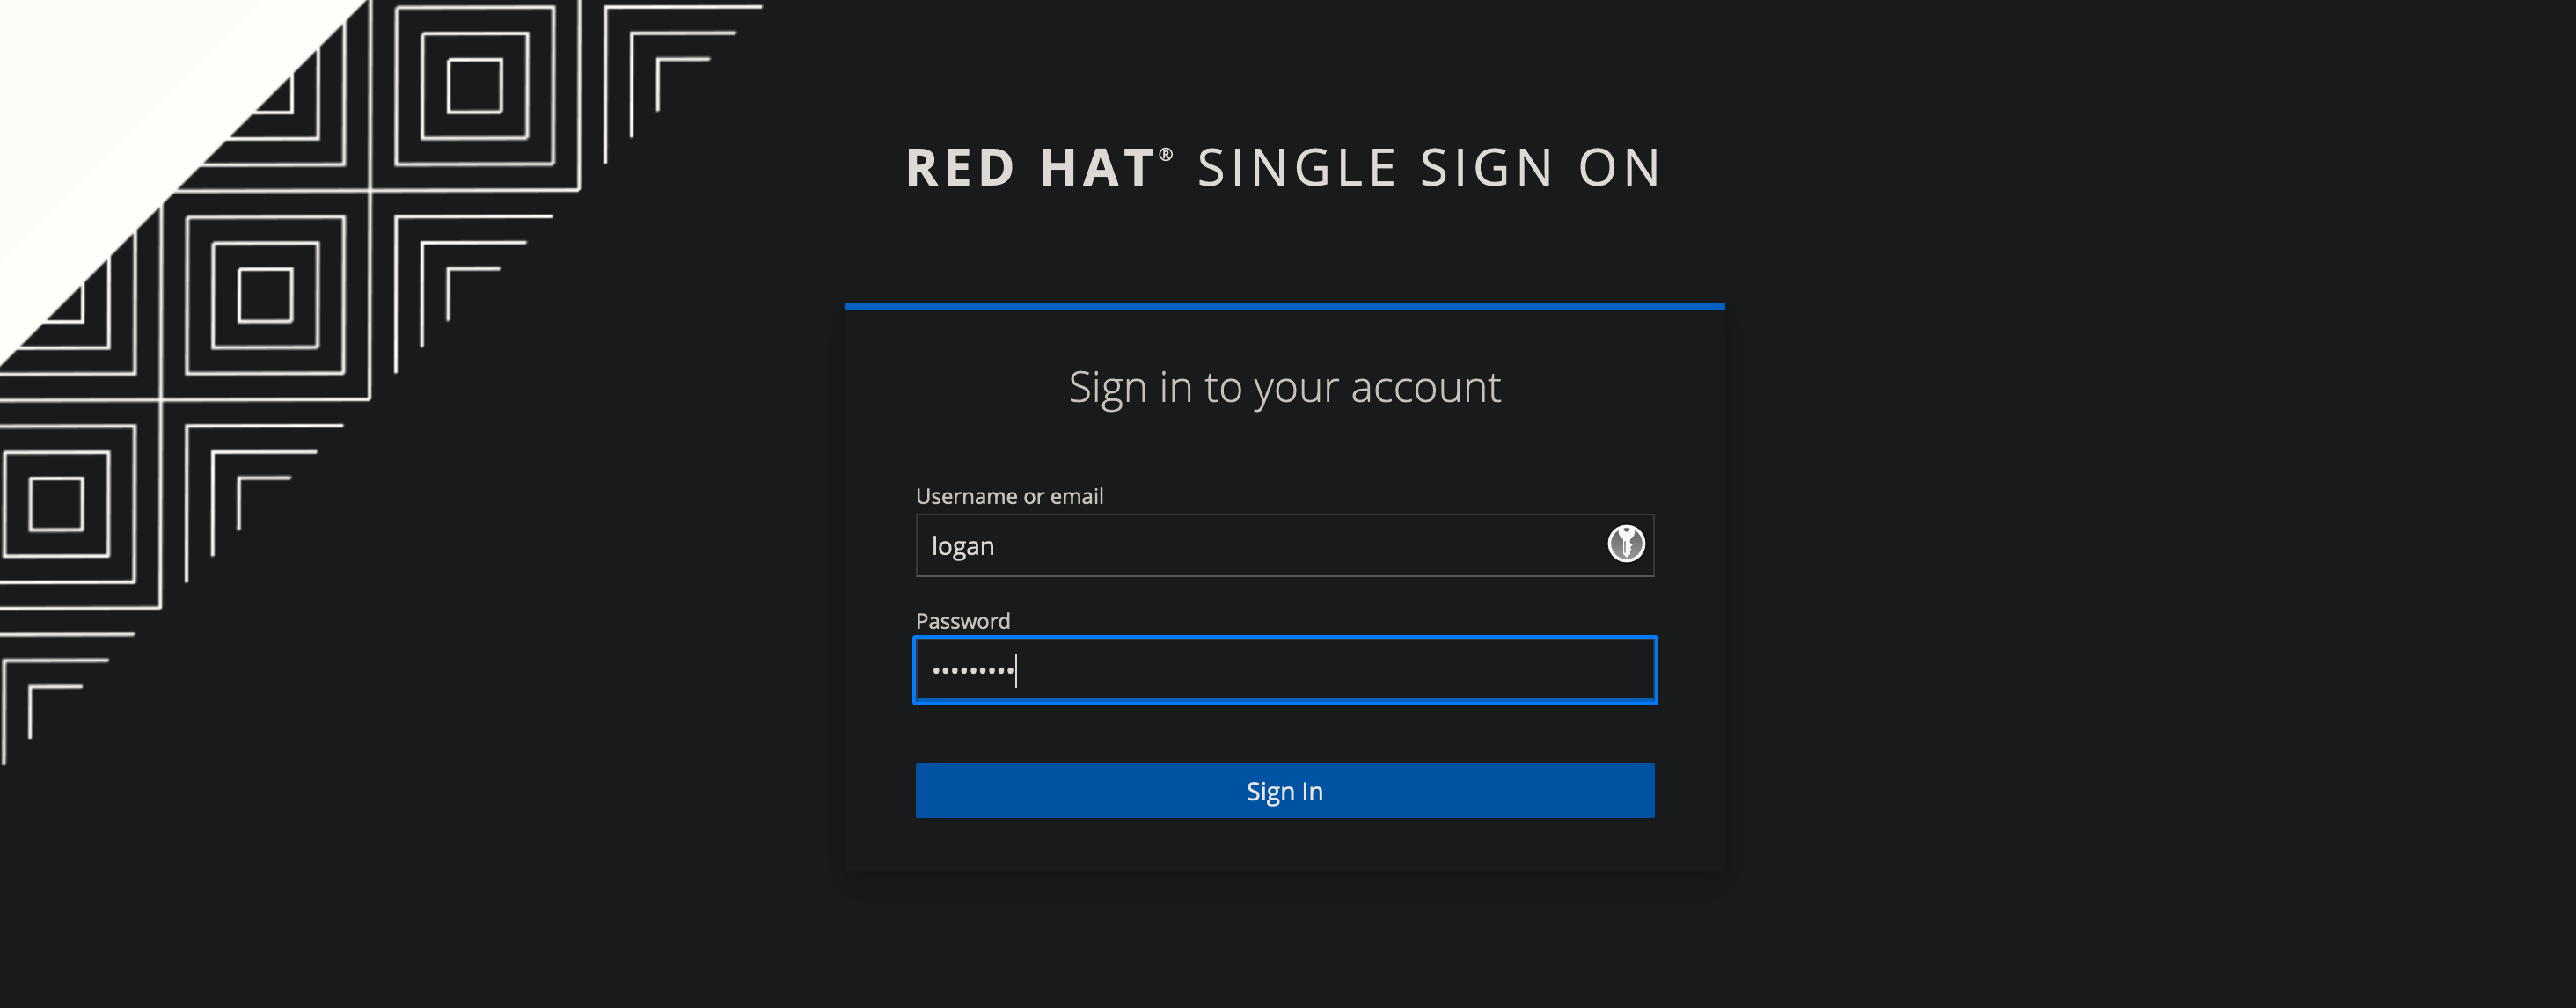
They will receive the Access Denied message and will not be redirected to OpenShift or logged into OpenShift.

Discuss this post on GitHub here! Comments and feedback welcome.